

Saturday 17 September 2011
Friday 16 September 2011
How To Print My Patterns
This is a question I am asked over and over. So I thought I would clarify some easy steps you can take to make sure that the pattern you print at home is as accurate as possible.
This is my print option screen. Where it lists "Page Scaling" the option selected is NONE. This is correct and this is what we want. It means that the document will print as is without any automatic (and usually helpful) re-sizing.
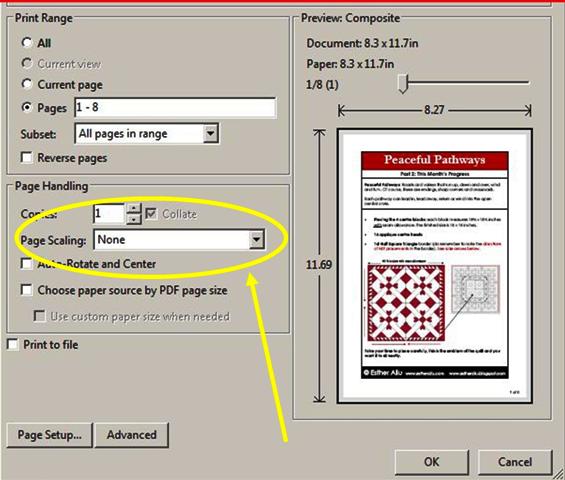
In the snap below, the printer has automatically selected "Shrink to Printable Area". Again, this is usually helpful, but is not wanted when printing patterns. In this instance, you would select "none" as the option (just like the snap above).

In the snap below, the printer has selected "Fit to Printable Area". Again, this is usually helpful, but is not wanted when printing patterns. In this instance, you would select "none" as the option (just like the snap above).
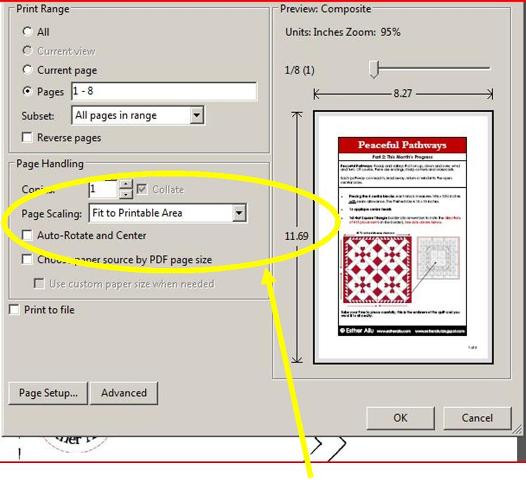
It's quite common for printers to automatically re-size PDF documents. You may not have even noticed this feature. With my patterns, the work is always within the margins of A4 paper, so you don't need to think about whether the pattern will fit the page. It always will.
Make sure your printer is not adjusting your print out and also take a moment to look at the margins of the printable area, as in the snap below. Sometimes they can set themselves to half a page or 80% for no apparent reason. In this snap below, everything is fine and the pattern printed perfectly.

So, to sum up:
All patterns are set to print to A4 for easy home printing
Make sure that your printer is set to print to 100%
If your print preview shows that you are set to print at 95%, make sure the default "shrink to printable area" box is not checked. If it is, uncheck it.
Make sure your printer does not ‘re-scale– PDF documents prior to printing.
For all ‘re-scaling’ options, select none
For all ‘shrink to printable area’ options, ensure this is not set
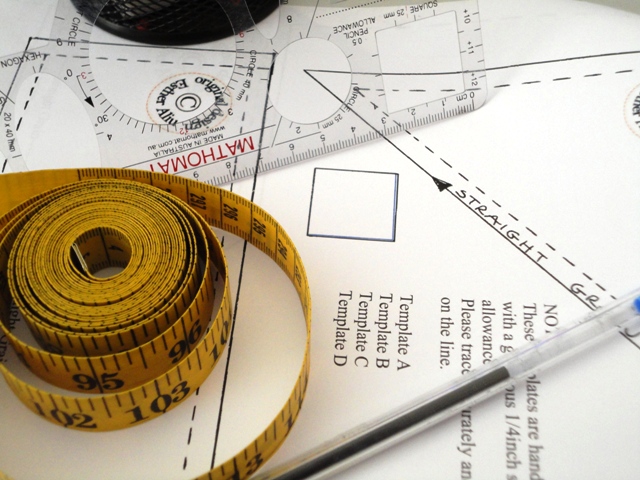
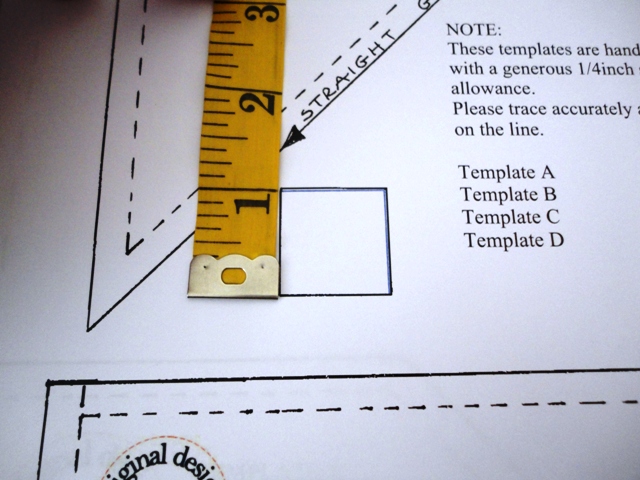
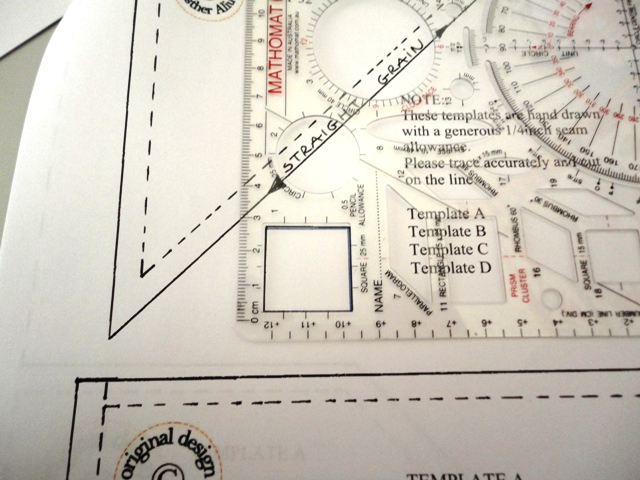
Check that the "Inch Square" I add to each pattern actually measures an inch when you print it out. This ensures that you are printing the pattern at the correct size. If you do not print accurately, measure the difference and adjust your pattern accordingly.
I hope this clarifies any printing issues, now let's get back to doing what we do best....creating!
Thursday 15 September 2011
Peaceful Pathways: Part 2 is launched
Peaceful Pathways: Roads and valleys that run up, down and over, wind and turn. Of course, there are endings, sharp corners and crossroads.

How is everyone faring with Peaceful Pathways so far? I’ve seen many beautifully embroidered text blocks by machine and hand and I'm looking forward to seeing what you all get up to this month.
With the 4 centre square blocks completed, I’m already thinking about the kind of quilting that would work on the pathways. I’m considering white quilted feathers at this stage.

If you are making Peaceful Pathways, do consider joining my Yahoo BOM Group. Membership is and always will be free. It’s a great place to discuss the pattern, share ideas and post photos of your progress.
My patterns are only available via my website or yahoo group only
Wednesday 14 September 2011
WOW: GoBaby Brights Quilt
WOW = WIPs On Wednesday
Yes, I've been working on my GOBaby Quilt again

I’m thinking about a border of half square triangles – done the fast and easy way of course.
I love it. I’ve already got plans for the next top and a few projects too. I didn’t think I’d be this excited about a cutting tool, but I have been pleasantly surprised.


Tuesday 13 September 2011
It’s Tomorrow, Today
Update: 10:55am
Yes, I am using fusible throughout. That way I can simply iron into place. I plan to satin or buttonhole stitch afterwards.
I am still considering my options - because fusible is too expensive to use as freely as I want. I have so many plans. I'm thinking about glues like liquid stitch? But since it's not readily available where I am, I am thinking this through.
With fusible, even with the added cost, I still feel the advantages outweigh the cost. I am really still experimenting and deciding as I go. I will keep you posted. Working with this easy cutter is still new to me.
So if you have any thoughts, please share them, I'd love to know.

Oops, I forgot to post my GOBaby progress. Where was I? Oh yes, here we are

As I mentioned in my previous post, going straight into arrangement without cutting is a lot of fun and I’ve been playing around with brights. I have some projects – a bit different to what I normally do, that I’ve been meaning to make for some time. But you know how it is. With so many WIPs on the go, I never find the time. And to be frank, I haven’t been motivated to organise and cut…for the sake of experimenting.
Until now...


Still going ... will update again
tomorrow for WOW
tomorrow for WOW
Subscribe to:
Posts (Atom)